CARD – Embossed Balloon Birthday

Guess what I received on Wednesday?! Yup, UPS brought me brand new sneak peek products!!! As a Stampin’ Up! demonstrator, I get the opportunity to purchase new product before it is available to the general public. I’ve already seen (and ordered from) the new Fall Occassions Catalog … and I’ve gotta tell ya, it was hard to decide what to get! I’ll be working on new samples to show you over the weekend, and will hopefully have some fun stuff to share in Monday’s post!

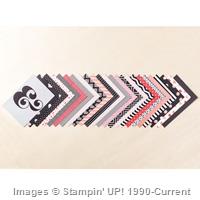
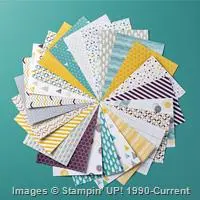
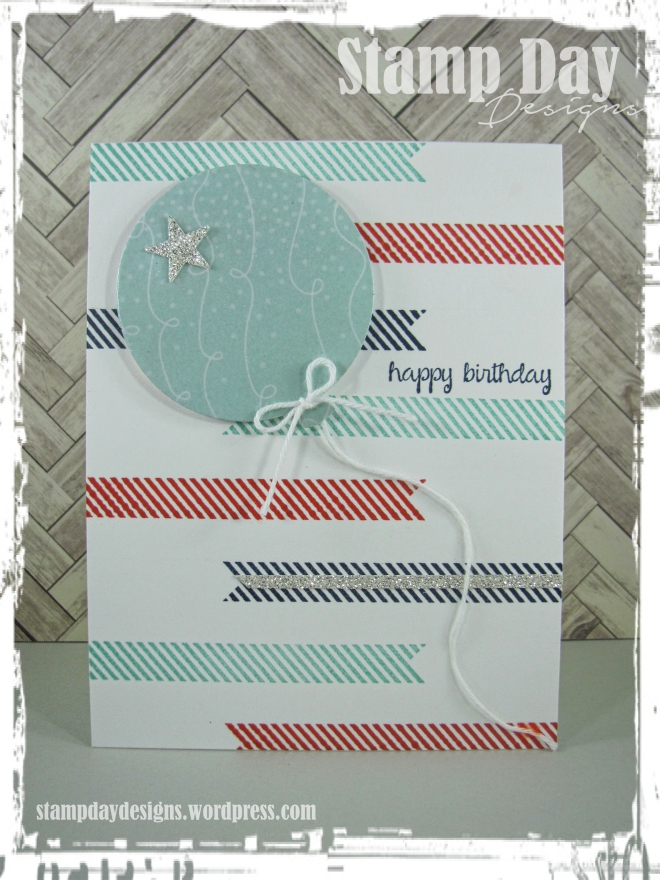
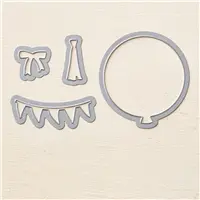
Today’s card was a fun little project using the balloon framelits. I wanted to try out a fun new technique I’d seen recently, so I die cut my balloon from a piece of the “Cherry on Top” DSP stack, and covered the whole thing in Versamark ink. Then I heat set the entire surface in clear embossing powder. It’s very hard to see in this picture, but the balloon turned out so shiny!

Stamp Day Designs, Balloon Birthday (1)

Stamp Day Designs, Balloon Birthday (2)

See ya next time … ink, ink, smudge, smudge!
–Jessica Kerr, Independent Stampin’ Up! Demonstrator
Place your order today! Send me an email: stampdaydesigns@gmail.com

Price: $110.00

Supply List

Built for Free Using: My Stampin Blog

CARD – Jellyfish Birthday

Good morning! Today’s card evolved as I was planning some projects for an at-home workshop. I had done a watercolor resist technique at one of my Open Houses with the “You’ve Got This” stamp set a while back (view that card here), but a couple of my guests didn’t care for floral images and asked if they could look through my stamp sets for a suitable substitute. I always get excited when my novice stampers start thinking outside of the box, and when they chose the jellyfish image from “From Land to Sea,” I knew they’d picked a winner.

I liked their idea so much that I decided to create another version of that card, but this time with a more ocean worthy color scheme. This first card was the rough-draft … it turned out great, but I felt I needed to pare down on supplies and bump up the contrast.

Stamp Day Designs, Jellyfish (1)

Stamp Day Designs, Jellyfish (2)

The second version turned out just right, and by paring down the supplies it also gave everyone a little more time to spend on their watercoloring technique.

Stamp Day Designs, Jellyfish II (1)

Stamp Day Designs, Jellyfish II (2)

I started with an A2 card base of Bermuda Bay, and stamped two different images from “Gorgeous Grunge” into the opposing corners in Bermuda Bay ink.

I heat embossed the jellyfish and sentiment in White Stampin’ Emboss Powder onto watercolor paper before watercoloring with my reinkers and Aqua Painters (I used Tempting Turquoise at the bottom, Bermuda Bay in the middle, and Pool Party at the top). I was very careful to leave about 1/4″ of white paper showing around the edge.

Once I’d finished painting, I used the fine splatter image from “Gorgeous Grunge” to create some distressing. I stamped-off two or three times to lighten the effect before randomly stamping across the front of my painting. I added some sequins from the Bermuda Bay Sequin Trim and a little banner punched from a scrap of Whisper White. And then finished it all off by popping the whole thing onto the card base with some Stampin’ Dimensionals.

See ya next time … ink, ink, smudge, smudge!
–Jessica Kerr, Independent Stampin’ Up! Demonstrator
Place your order today! Send me an email: stampdaydesigns@gmail.com

Price: $5.25

Supply List

Built for Free Using: My Stampin Blog

CARD – Lucky You!

Good morning stampers! Today’s project was inspired by a shirt I recently purchased. I just loved the mix of colors, and thought that it would make a beautiful color scheme for a card.

I decided to sponge a gradient for the background, so I grabbed a panel of Whisper White card stock and started at the bottom. The colors are: Blackberry Bliss, Rich Razzleberry, Real Red, and Tangelo Twist. I also sprayed the finished panel with a little Champagne Mist Shimmer Paint* mixed with rubbing alcohol to give it that shimmery finish.

My shirt had some gold button accents, so I added some gold sequins and gold ribbon to finish off my card. Hope you like it!

Stamp Day Designs, Lucky You (1)

Stamp Day Designs, Lucky You (2)

See ya next time … ink, ink, smudge, smudge!
–Jessica Kerr, Independent Stampin’ Up! Demonstrator
Place your order today! Send me an email: stampdaydesigns@gmail.com

Price: $110.00

Supply List

Built for Free Using: My Stampin Blog


*Champagne Mist Shimmer Paint was retired from the Stampin’ Up! catalog in 2013, but was not a Stampin’ Up! exclusive product. It is still produced by Tsukineko, and is currently available at many craft retailers, including Amazon.

CARD – Just Because

Well, the Blendabilities markers line may be discontinued, but I still had this one last card to show you:

Stamp Day Designs, Just Because (1) Stamp Day Designs, Just Because (2)

I started with an A2 card base of Calypso Coral, and added a small strip from the Stacked with Love DSP stack. Then I took a different pattern from the same DSP stack, split the panel and popped both pieces up on Dimensionals to highlight the sentiment (stamped in Memento Tuxedo Black ink on the strip between).

I stamped my flower in Memento ink onto Whisper White and colored it with my Calypso Coral and Daffodil Delight Blendabilities markers. I punched it out with the coordinating punch and covered the center in Crystal Effects. After the center had dried, I adhered it with more Dimensionals to center/left of the split.

See ya next time … ink, ink, smudge, smudge!
–Jessica Kerr, Independent Stampin’ Up! Demonstrator
Place your order today! Send me an email: stampdaydesigns at gmail dot com

Supply List

Built for Free Using: My Stampin Blog


CARD – Groovy Moonlight DSP Love

Okay, okay … so Valentine’s Day may be over, but that doesn’t stop me from making little love notes! I like to keep a few of these on hand throughout the year to surprise the hubby. When I know he’s having an especially bad week, or when he’s working loads and loads of hours, I like to sneak one into his lunch box, leave one on the dashboard of his car, or just stick one onto back door at eye level so he’ll see it as he’s headed out to work. I really believe that it’s the little things that can make the biggest difference. 😉

Anyway, I really like the Moonlight Designer Series Paper Stack, don’t you? I was hunting around on Pinterest for a little inspiration, and I came across this card by Eva Schrottmeyer. I attempted to CASE her card exactly, but I goofed up the proportions a little and quickly found that three little hearts just wouldn’t fit on mine. Since the Sweetheart punch is just a larger version of the Itty Bitty Punch Pack heart, I figured that I would get a close enough approximation without losing the essence of the design (not to mention I got to use that lovely ampersand!). Here are my results:

Stamp Day Designs, Groovy Love (1) Stamp Day Designs, Groovy Love (2)

Turned out fairly well, if I do say so myself! Now it’s your turn:

  1. Start with an 5-1/2″ x 8-1/2″ piece of Smoky Slate card stock. Score and fold at 4-1/4″ to create an A2 card base.
  2. Cut a 5″ x 3-3/4″ panel of Blackberry Bliss.
  3. Cut a 4-3/4″ x 2-5/8″ piece of Moonlight DSP stack, and a 4-3/4″ x 7/8″ piece of Whisper White card stock. Lay the two pieces on your work surface (face down), and join them at the long edge with a piece of tape to create a single panel. Adhere to the center of the Blackberry Bliss panel with Snail adhesive.
  4. Stamp the “I Heart You” sentiment from the And Many More stamp set in the lower right of the Whisper White area, in Hello Honey ink.
  5. Cut a 6″ piece of Blackberry Bliss 3/8″ Satin Stitched Ribbon and wrap around the front of the panels (covering the seam), attaching the ends in the back. Adhere to the center of the Smoky Slate card front.
  6. Die cut a 2-3/8″ circle out of Blackberry Bliss, using the Circles Collection Framelits.
  7. Stamp the ampersand heart image from the Groovy Love stamp set with Smoky Slate ink on Whisper White card stock. Punch out with the 2″ Circle punch. Adhere to the center of the Blackberry Bliss circle with Snail adhesive.
  8. Punch a heart out of Hello Honey, using the Sweetheart punch. Then use the 2″ Circle Punch to punch out the negative space left by the heart. Adhere over top of the Whisper White circle with Stampin’ Dimensionals.
  9. Use sticky strip to attach the circled heart to the front of the card, over top of the ribbon.
  10. Time to add a little bling! I ran out of Rhinestone Basic Jewels, so I improvised with this large one from my daughter’s craft stash!

See ya next time … ink, ink, smudge, smudge!
–Jessica Kerr, Independent Stampin’ Up! Demonstrator
Place your order today! Send me an email: stampdaydesigns at gmail dot com

Price: $99.95

Supply List

Built for Free Using: My Stampin Blog