CARDS – Final Few Projects

The new catalog launches on June 2nd … that’s only TWO days away!!  I guess I’d better show you the last few projects I made with some of the retiring product!

CASEd from Allison Okamitsu of Nice People Stamp (ADT 2014):

Stamp Day Designs, Twitterpated (1)

Stamp Day Designs, Twitterpated (2)

CASEd from Cindy Schuster of Nutmeg Creations (ADT 2014):

Stamp Day Designs, Moonlight DSP (1)Stamp Day Designs, Moonlight DSP (2)

CASEd from the Stampin’ Up! Corporate blog:

Stamp Day Designs, Happy Big Day (1) Stamp Day Designs, Happy Big Day (2)

See ya next time … ink, ink, smudge, smudge!
–Jessica Kerr, Independent Stampin’ Up! Demonstrator
Place your order today! Send me an email: stampdaydesigns@gmail.com

CARDS – Wedding Roundup!

I mentioned a couple of weeks ago that I wasn’t prepared for wedding season … well, I’ve since remedied that dreadful situation, and now have several cards completed for some very wonderful people:

Stamp Day Designs, Perfect Day Swallowtail (2) Stamp Day Designs, Perfect Day Swallowtail (1)

CASEd from Kristin:

Stamp Day Designs, Congrats to You Two II (1)

Stamp Day Designs, Congrats to You Two II (2)

CASEd from Stamping with Val:Stamp Day Designs, Congrats to You Two (2) Stamp Day Designs, Congrats to You Two (1)

See ya next time … ink, ink, smudge, smudge!
–Jessica Kerr, Independent Stampin’ Up! Demonstrator
Place your order today! Send me an email: stampdaydesigns@gmail.com

CARD – You Make Me Happy

Today’s project had a mind of its own, lol! I hadn’t really used much of my Stacked with Love DSP, and since it will be retiring in a couple of weeks, thought I’d pull it out. This one ended up looking very “Valentine’s Day” to me, so I’ll probably keep it in my stash ’til next year. Even so, I was happy with the way it turned out.

Stamp Day Designs, You Make Me Happy (1)

Stamp Day Designs, You Make Me Happy (2)

I think the construction of this one is pretty straight forward, so I’ll spare you all of the boring details. But I did want to mention that I didn’t have any true Whisper White buttons, so I used one of the Sweet Dreams Designer Series Buttons … because the back of the largest button is white! 😉

See ya next time … ink, ink, smudge, smudge!
–Jessica Kerr, Independent Stampin’ Up! Demonstrator
Place your order today! Send me an email: stampdaydesigns@gmail.com

CARD – Happily Ever After

Wedding season is coming, are you ready? Not me! I do have a couple of upcoming occasions, but I’ve got to admit that I’m not very prepared. When I peeked in my card stash recently, my heart sank … either get to work, or head to the store (never!). Here’s a cute one that I came up with. Unfortunately, the pictures do NOT do this card justice. It is super sparkly/shimmery, but I just couldn’t get the camera to capture it properly.

Stamp Day Designs, Project (340)

Stamp Day Designs, Project (343)

I started with an A2 card base of Shimmery White card stock. I heat embossed the leaves image from World of Dreams twice with Iridescent Ice Stampin’ Emboss Powder, pointing the image into opposite corners.

Next, I heat embossed the “Happily Ever After” sentiment from Big News (retiring soon!) in Iridescent Ice again. I used a smaller piece of Shimmery White card stock and trimmed around the image to create a small panel. I backed this panel with a slightly larger piece of Wisteria Wonder card stock and stapled a some strips of Wisteria Wonder Ruffled Ribbon (retired) at the left and right. This entire piece was popped up on some Stampin’ Dimensionals.

Finally, I fussed around with some of the little flower stamps/punches in Wisteria Wonder and came up with a grouping that I liked before sticking them down with Glue Dots in opposite corners and embellishing with rhinestones, pearls and a few sequins (the rhinestones were colored with the Wisteria Wonder Blendabilities markers, which have recently been discontinued).

See ya next time … ink, ink, smudge, smudge!
–Jessica Kerr, Independent Stampin’ Up! Demonstrator
Place your order today! Send me an email: stampdaydesigns@gmail.com

Price: $29.95

Price: $4.95

Supply List

Built for Free Using: My Stampin Blog

CARD – Congrats to You Two

The weather man says we should see 45º and sunshine today, so I’m doing a happy dance! The warmer weather brings with it inspiration for today’s card. I was feeling a little artsy, so I decided to make a messy watercolor painting. Soft pastels, with a nice splash of warm sunshine!

Stamp Day Designs, Congrats You Two (2)

Stamp Day Designs, Congrats You Two (1)

I don’t really think instructions are necessary, since this is such a simple design. I just heat embossed the sentiment with Irridescent Ice Stampin’ Emboss Powder onto a piece of watercolor paper and then used my reinkers and Aqua painter to add color. Once I had the colors the way I wanted them, I flicked and dropped water randomly and let it dry to create the spotches and splatters. Add a layer of vellum underneath, pop it up with dimensoinals, add a little bling (the sequins were from my sewing box, lol), and voila!

See ya next time … ink, ink, smudge, smudge!
–Jessica Kerr, Independent Stampin’ Up! Demonstrator
Place your order today! Send me an email: stampdaydesigns at gmail dot com


Price: $29.95

Supply List

Built for Free Using: My Stampin Blog

CARD – On Your Perfect Day

Yesterday was Stamp Day, and boy did I have FUN! Lots of new stuff to play with, and even some great inspiration from Pals Paper Arts. I really liked the simplicity of their latest Sketch Challenge, PPA241:

Pals Paper Arts, Sketch Challenge PPA241

This sketch instantly reminded me of the lace frame from SVGCuts that I had used before in this card. I also just received the “Your Perfect Day” stamp set in my latest order, and I knew the cake image would look fabulous framed in the center of the oval. But, I also wanted to do something a little different with it, so I cut the lace frame out of a Silver Foil sheet. I hope you enjoy it!

Stamp Day Designs, On Your Perfect Day (1) Stamp Day Designs, On Your Perfect Day (2)

I think I’m going to skip all of the usual instructions on this one, but I will say that I colored the cake frosting and birds with Soft Sky Blendabilities. I also dyed some Whisper White 1/4″ Cotton Ribbon with my reinker because I didn’t have ribbon to match. The little banner across the middle was flagged on the ends with the Hexagon punch.

See ya next time … ink, ink, smudge, smudge!
–Jessica Kerr, Independent Stampin’ Up! Demonstrator
Place your order today! Send me an email: stampdaydesigns at gmail dot com

Supply List

Built for Free Using: My Stampin Blog

CARD – Groovy Moonlight DSP Love

Okay, okay … so Valentine’s Day may be over, but that doesn’t stop me from making little love notes! I like to keep a few of these on hand throughout the year to surprise the hubby. When I know he’s having an especially bad week, or when he’s working loads and loads of hours, I like to sneak one into his lunch box, leave one on the dashboard of his car, or just stick one onto back door at eye level so he’ll see it as he’s headed out to work. I really believe that it’s the little things that can make the biggest difference. 😉

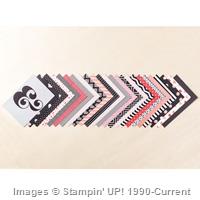
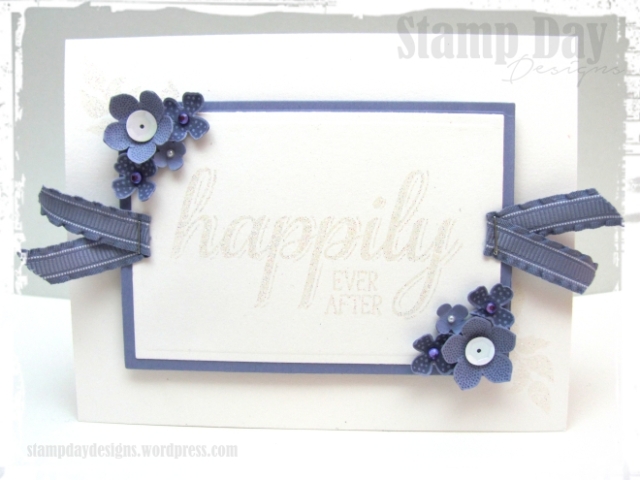
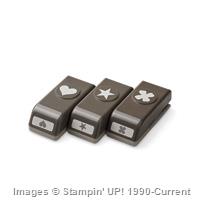
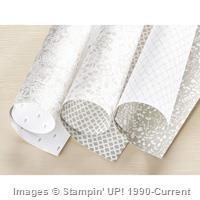
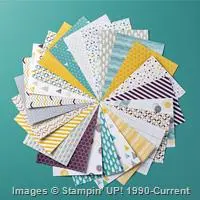
Anyway, I really like the Moonlight Designer Series Paper Stack, don’t you? I was hunting around on Pinterest for a little inspiration, and I came across this card by Eva Schrottmeyer. I attempted to CASE her card exactly, but I goofed up the proportions a little and quickly found that three little hearts just wouldn’t fit on mine. Since the Sweetheart punch is just a larger version of the Itty Bitty Punch Pack heart, I figured that I would get a close enough approximation without losing the essence of the design (not to mention I got to use that lovely ampersand!). Here are my results:

Stamp Day Designs, Groovy Love (1) Stamp Day Designs, Groovy Love (2)

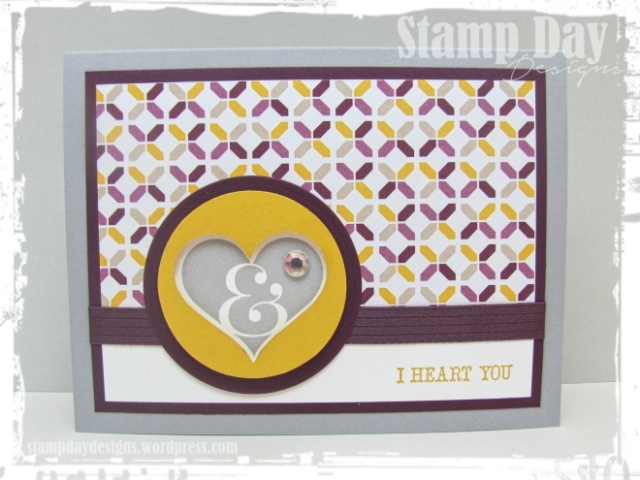
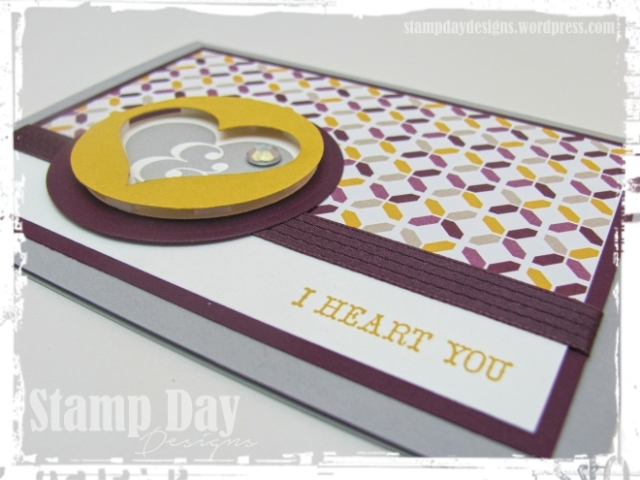
Turned out fairly well, if I do say so myself! Now it’s your turn:

  1. Start with an 5-1/2″ x 8-1/2″ piece of Smoky Slate card stock. Score and fold at 4-1/4″ to create an A2 card base.
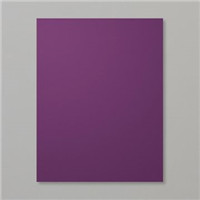
  2. Cut a 5″ x 3-3/4″ panel of Blackberry Bliss.
  3. Cut a 4-3/4″ x 2-5/8″ piece of Moonlight DSP stack, and a 4-3/4″ x 7/8″ piece of Whisper White card stock. Lay the two pieces on your work surface (face down), and join them at the long edge with a piece of tape to create a single panel. Adhere to the center of the Blackberry Bliss panel with Snail adhesive.
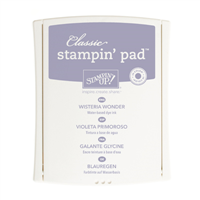
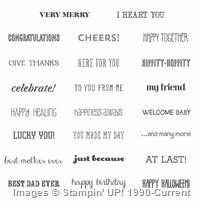
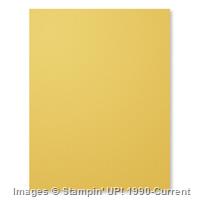
  4. Stamp the “I Heart You” sentiment from the And Many More stamp set in the lower right of the Whisper White area, in Hello Honey ink.
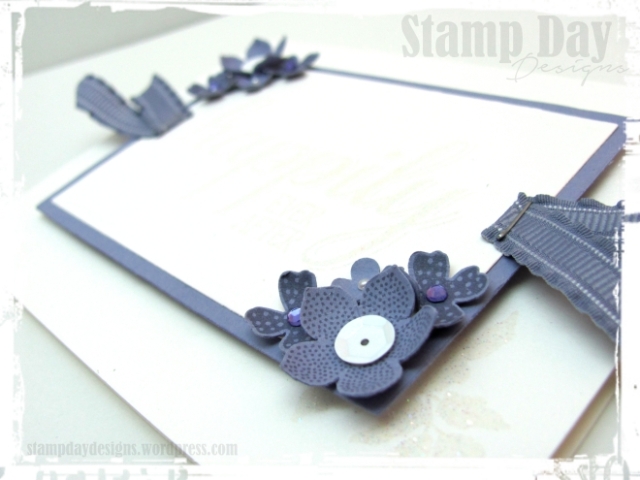
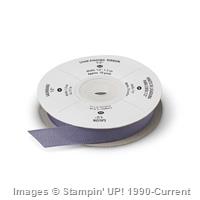
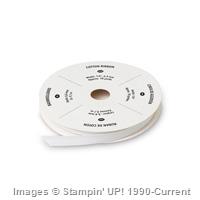
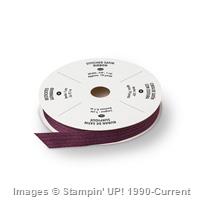
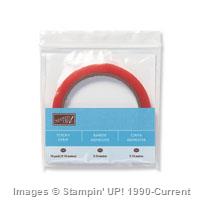
  5. Cut a 6″ piece of Blackberry Bliss 3/8″ Satin Stitched Ribbon and wrap around the front of the panels (covering the seam), attaching the ends in the back. Adhere to the center of the Smoky Slate card front.
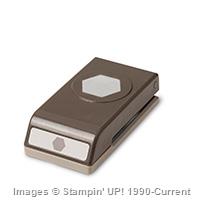
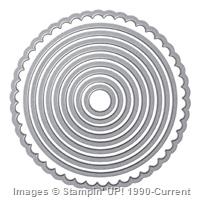
  6. Die cut a 2-3/8″ circle out of Blackberry Bliss, using the Circles Collection Framelits.
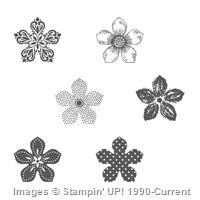
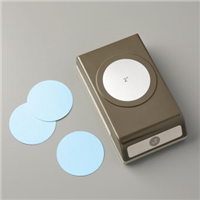
  7. Stamp the ampersand heart image from the Groovy Love stamp set with Smoky Slate ink on Whisper White card stock. Punch out with the 2″ Circle punch. Adhere to the center of the Blackberry Bliss circle with Snail adhesive.
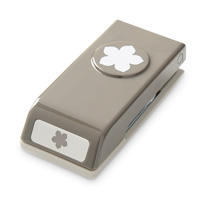
  8. Punch a heart out of Hello Honey, using the Sweetheart punch. Then use the 2″ Circle Punch to punch out the negative space left by the heart. Adhere over top of the Whisper White circle with Stampin’ Dimensionals.
  9. Use sticky strip to attach the circled heart to the front of the card, over top of the ribbon.
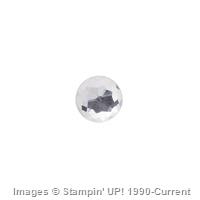
  10. Time to add a little bling! I ran out of Rhinestone Basic Jewels, so I improvised with this large one from my daughter’s craft stash!

See ya next time … ink, ink, smudge, smudge!
–Jessica Kerr, Independent Stampin’ Up! Demonstrator
Place your order today! Send me an email: stampdaydesigns at gmail dot com

Price: $99.95

Supply List

Built for Free Using: My Stampin Blog