CARDS – Wedding Roundup!

I mentioned a couple of weeks ago that I wasn’t prepared for wedding season … well, I’ve since remedied that dreadful situation, and now have several cards completed for some very wonderful people:

Stamp Day Designs, Perfect Day Swallowtail (2) Stamp Day Designs, Perfect Day Swallowtail (1)

CASEd from Kristin:

Stamp Day Designs, Congrats to You Two II (1)

Stamp Day Designs, Congrats to You Two II (2)

CASEd from Stamping with Val:Stamp Day Designs, Congrats to You Two (2) Stamp Day Designs, Congrats to You Two (1)

See ya next time … ink, ink, smudge, smudge!
–Jessica Kerr, Independent Stampin’ Up! Demonstrator
Place your order today! Send me an email: stampdaydesigns@gmail.com

CARDS – Butterfly Thinlits

Another Stampin’ Up! product that I am in love with lately is the Butterflies thinlits. It doesn’t take much to assemble a clean and simple (yet stunning) card, especially with that intricately cut butterfly!

I had a lot of fun helping my kids make some Mother’s Day cards for their grandmas and great-grandmas a couple of weeks ago. I let them pick through my retired DSP stash and choose whatever they liked best. I simply cut the sheets in half so they would fit in the Big Shot, and showed them how to use the Spellbinders Card Creator dies so their panels would be perfectly sized (no math required!). Then I put them to work with a Fiskars Stamp Press … it’s so easy for them to just let go of the press and allow it to pop up off of the page (my little guy just doesn’t have the coordination to lift the stamp straight up without smudging). Of course I helped make sure everything was adhered straight, and bows were neatly tied … but they did 75% of the work, I swear! We even had enough leftovers to make a couple of birthday cards!

Stamp Day Designs, Butterfly Basics III (1)

Stamp Day Designs, Butterfly Basics III (2)

Stamp Day Designs, Butterfly Basics IV (1)

Stamp Day Designs, Butterfly Basics IV (2)

Stamp Day Designs, Butterfly Basics II (1)

Stamp Day Designs, Butterfly Basics II (2)

Stamp Day Designs, Butterfly Basics I (1)

Stamp Day Designs, Butterfly Basics I (2)

See ya next time … ink, ink, smudge, smudge!
–Jessica Kerr, Independent Stampin’ Up! Demonstrator
Place your order today! Send me an email: stampdaydesigns@gmail.com


CARD – You Make Me Happy

Today’s project had a mind of its own, lol! I hadn’t really used much of my Stacked with Love DSP, and since it will be retiring in a couple of weeks, thought I’d pull it out. This one ended up looking very “Valentine’s Day” to me, so I’ll probably keep it in my stash ’til next year. Even so, I was happy with the way it turned out.

Stamp Day Designs, You Make Me Happy (1)

Stamp Day Designs, You Make Me Happy (2)

I think the construction of this one is pretty straight forward, so I’ll spare you all of the boring details. But I did want to mention that I didn’t have any true Whisper White buttons, so I used one of the Sweet Dreams Designer Series Buttons … because the back of the largest button is white! 😉

See ya next time … ink, ink, smudge, smudge!
–Jessica Kerr, Independent Stampin’ Up! Demonstrator
Place your order today! Send me an email: stampdaydesigns@gmail.com

CARD – Happy Birthday, Simply Wonderful

Today’s project was a CASE of this card from the Simon Says Stamp blog. I thought it would be fun to attempt a recreation using my own tools, materials and stamps. I definitely cannot say that my version turned out as beautifully as theirs, but I think it could earn a passing grade …

Stamp Day Designs, HB - You're Simply Wonderful (1)

Stamp Day Designs, HB - You're Simply Wonderful (2)I started out with a tent-fold A2 card base of Basic Black. On a slightly smaller panel of Whisper White, I heat embossed the scratched image from “Gorgeous Grunge” several times and then sponged on some Melon Mambo, Rich Razzleberry and Soft Sky inks before running it through the Lucky Stars Textured Impressions Embossing Folder.

Next, I used the Circle Collection Framelits and a 2″ Circle Punch to create the circle you see in Basic Black and Whisper White, popped up on some Stampin’ Dimensionals. The Whisper White Circle is stamped with one of the recent hostess sets, “Because You Care” and the striped image is from “Gorgeous Grunge”. I also added a few black rhinestones that I had laying around from the craft store.

I finished everything off with a narrow Basic Black banner (end was flagged with my hexagon punch), and a heat embossed sentiment.

See ya next time … ink, ink, smudge, smudge!
–Jessica Kerr, Independent Stampin’ Up! Demonstrator
Place your order today! Send me an email: stampdaydesigns@gmail.com

Price: $29.95

Price: $99.95

Supply List

Built for Free Using: My Stampin Blog

CARD – Birthday Bombs Away!

And here’s my new favorite again, the Mini Treat Bag Thinlit die … I am just in love, love, love! ENJOY!

Stamp Day Designs, For You Birthday Bomb (1)

Stamp Day Designs, For You Birthday Bomb (2)

Stamp Day Designs, For You Birthday Bomb (3)

See ya next time … ink, ink, smudge, smudge!
–Jessica Kerr, Independent Stampin’ Up! Demonstrator
Place your order today! Send me an email: stampdaydesigns@gmail.com

Price: $99.95

Supply List

Built for Free Using: My Stampin Blog

Card – Yay!

A quick post today! This one consisted of a little sponging over some heat embossed balloons, a bit of DSP and an embossing folder … voila! I intentionally left it a little vague on the front, and will add an interior sentiment when the time comes. It might end up being a birthday, graduation, congratulations, or even a baby card! It’s always nice to have a few options available if a last minute occasion pops up.

Stamp Day Designs, Yay! (1)

Stamp Day Designs, Yay! (2)

See ya next time … ink, ink, smudge, smudge!
–Jessica Kerr, Independent Stampin’ Up! Demonstrator
Place your order today! Send me an email: stampdaydesigns@gmail.com

Price: $29.95

Supply List

Built for Free Using: My Stampin Blog

CARD – Sending Wishes Your Way

I cannot tell you how absolutely thrilled I am about one of my newest acquisitions, the Mini Treat Bag Thinlits Dies. Originally I was a little worried I would be stuck with a rather expensive “unitasker” (a term coined by one of my all-time-favorite television personalities, Alton Brown, to describe a tool that performs only a single function). I personally don’t make treat bags or favors particularly often, but I really loved all of the extra little dies that were included (hearts, stars, banner, phrases, etc.) I’ve been trying to force myself out of my comfort zone lately, so I decided to take a leap of faith on this one.

I was pleasantly surprised to find that the assembled bag measured only a little smaller than a typical A2 card. And since this is a “flat” bag (no gussets/bottom), it works beautifully as a fancy little envelope for an adorable 3-1/2″ x 5″ pull style card (and will even fit into an A2 envelope for mailing!).

This card went together really fast, but I couldn’t be happier with the results!

Stamp Day Designs, Sending Wishes Your Way (1)

Stamp Day Designs, Sending Wishes Your Way (2)

Stamp Day Designs, Sending Wishes Your Way (4)

I will forgo the boring details this time, as I think it’s pretty clear from the pictures how it was made. 😉

See ya next time … ink, ink, smudge, smudge!
–Jessica Kerr, Independent Stampin’ Up! Demonstrator
Place your order today! Send me an email: stampdaydesigns@gmail.com

Price: $99.95

Supply List

Built for Free Using: My Stampin Blog

CARD – Happily Ever After

Wedding season is coming, are you ready? Not me! I do have a couple of upcoming occasions, but I’ve got to admit that I’m not very prepared. When I peeked in my card stash recently, my heart sank … either get to work, or head to the store (never!). Here’s a cute one that I came up with. Unfortunately, the pictures do NOT do this card justice. It is super sparkly/shimmery, but I just couldn’t get the camera to capture it properly.

Stamp Day Designs, Project (340)

Stamp Day Designs, Project (343)

I started with an A2 card base of Shimmery White card stock. I heat embossed the leaves image from World of Dreams twice with Iridescent Ice Stampin’ Emboss Powder, pointing the image into opposite corners.

Next, I heat embossed the “Happily Ever After” sentiment from Big News (retiring soon!) in Iridescent Ice again. I used a smaller piece of Shimmery White card stock and trimmed around the image to create a small panel. I backed this panel with a slightly larger piece of Wisteria Wonder card stock and stapled a some strips of Wisteria Wonder Ruffled Ribbon (retired) at the left and right. This entire piece was popped up on some Stampin’ Dimensionals.

Finally, I fussed around with some of the little flower stamps/punches in Wisteria Wonder and came up with a grouping that I liked before sticking them down with Glue Dots in opposite corners and embellishing with rhinestones, pearls and a few sequins (the rhinestones were colored with the Wisteria Wonder Blendabilities markers, which have recently been discontinued).

See ya next time … ink, ink, smudge, smudge!
–Jessica Kerr, Independent Stampin’ Up! Demonstrator
Place your order today! Send me an email: stampdaydesigns@gmail.com

Price: $29.95

Price: $4.95

Supply List

Built for Free Using: My Stampin Blog

CARD – HB #HAPPY BIRTHDAY

Good morning! Today’s card was inspired by the left-over scraps from yesterday’s birthday card …

Stamp Day Designs, HB (1)

Stamp Day Designs, HB (2)

I started with an A2 tent-fold card base of Whisper White and added a panel of Birthday Bash Specialty DSP (popped up on Stampin’ Dimensionals). Then I cut a strip of another sheet of Birthday Bash DSP (the one with Night of Navy stripes) on the same angle as the stripes. I wrapped a piece of 1/8″ Gold Ribbon around it and adhered it to the card front.

Next, I punched a 2-1/2″ Circle of Calypso Coral card stock and heat embossed the confetti image with Gold Stampin’ Emboss Powder. I put some sticky strip on the back and stuck down some random gold threads created by shredding another piece of 1/8″ Gold Ribbon.

Finally, I inked up the “HB” sentiment in Night of Navy and used a baby wipe to remove the ink from everywhere but the banner in the middle. Then I came back with my Stampin’ Write markers and colored the little bits with Coastal Cabana, Mossy Meadow and Calypso Coral before die cutting with the Chalk Talk Framelits and popping it up on the card front with more Stampin’ Dimensionals.

See ya next time … ink, ink, smudge, smudge!
–Jessica Kerr, Independent Stampin’ Up! Demonstrator
Place your order today! Send me an email: stampdaydesigns@gmail.com

Price: $29.95

Price: $99.95

Supply List

Built for Free Using: My Stampin Blog

CARD – Celebrate #HAPPYBIRTHDAY

Today I’m CASEing an adorable Birthday Card from the Spring mini catalog … have you seen this one on page 12? Oh my goodness, I just had to make it myself!

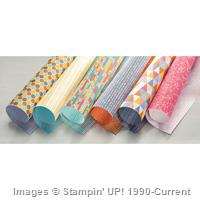
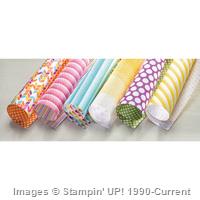
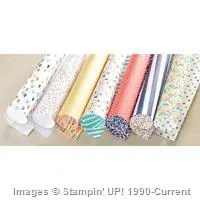
Please note, items from the 2015 Spring Occasions Catalog will be available until June 2nd. Unfortunately, the Birthday Bash Specialty DSP and Balloon Bash Photopolymer stamp set will NOT be carrying over into the 2015-2016 Annual Catalog. If you love this stamp set as much as I do, you’ll want to add it to your collection ASAP!

Stamp Day Designs, Celebrate! Happy Birthday (1)

Stamp Day Designs, Celebrate! Happy Birthday (2)

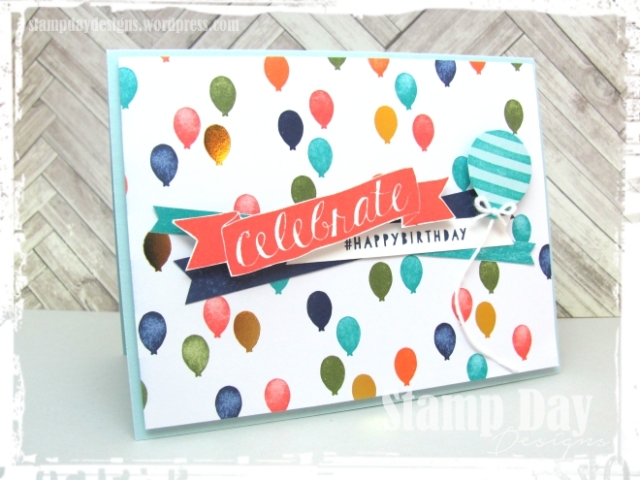
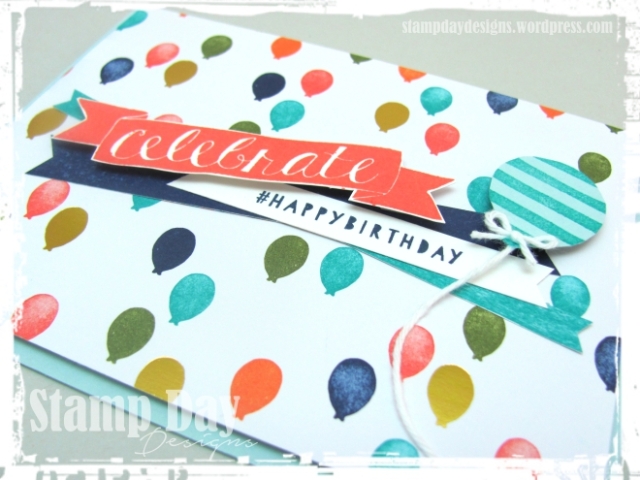
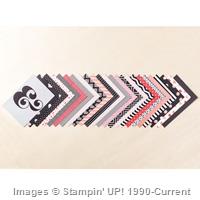
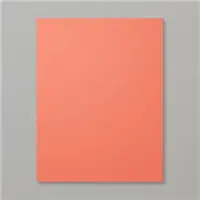
I started with an A2 card base of Soft Sky card stock, and added a layer of Birthday Bash DSP, which I popped up on some Stampin’ Dimensionals.

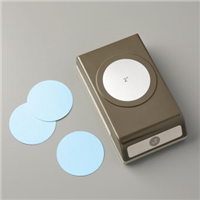
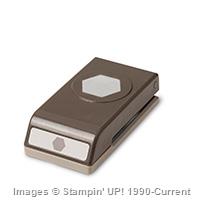
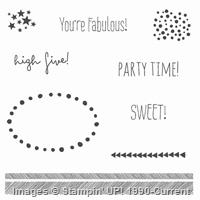
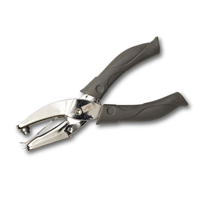
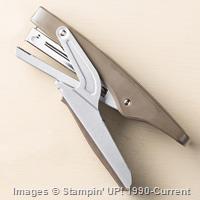
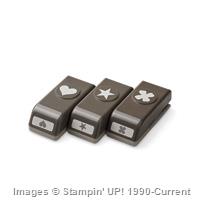
Then I stamped the image containing the “celebrate” banner in Calypso Coral onto a scrap of Whisper White card stock, and the balloon image in Bermuda Bay onto a scrap of Soft Sky card stock. Both were fussy cut with my paper snips. I inked just the “#HAPPYBIRTHDAY” sentiment from another image in Night of Navy and stamped onto a long, narrow scrap of Whisper White, flagging both ends with my Hexagon punch.

Next, I used two other sheets out of the Birthday Bash DSP pack. I cut a narrow strip out of the Night of Navy striped sheet and another from the Bermuda Bay striped sheet (flagging all ends with the Hexagon punch again).

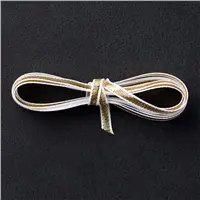
Finally, I assembled it all and added the Whisper White Baker’s Twine to the balloon … voila!

See ya next time … ink, ink, smudge, smudge!
–Jessica Kerr, Independent Stampin’ Up! Demonstrator
Place your order today! Send me an email: stampdaydesigns@gmail.com