CARD – A Little Thanks

I’m back! Just a quick post today with a fun fall thank you card. Unfortunately I haven’t had much time in the studio over the past few weeks, but I finally made a concentrated effort to ignore my enormous pile of housework and squeeze in some much needed paper therapy, lol!

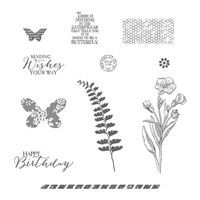
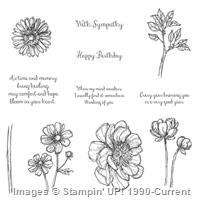
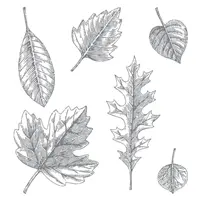
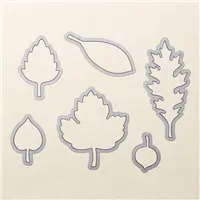
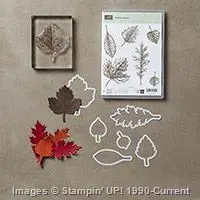
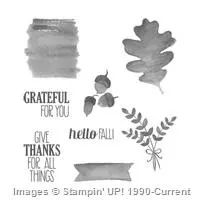
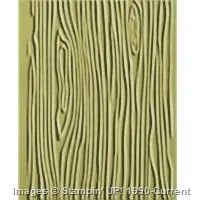
Today’s card features the Vintage Leaves photopolymer stamp set. Nature images are generally my favorite, and the coordinating Leaflet Framelits dies made this one of my must-have bundles from the 2015-2016 Annual Catalog.

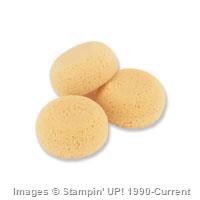
But enough about that, on to the project! It all started with a scrap of Hello Honey card stock … I heat embossed the oak leaf image in gold, die-cut, and then sponged the tips with some Tangelo Twist. I was honestly shocked by how pretty it turned out, and I just couldn’t bring myself to slap it on just any old card. So it’s been sitting in a prominent location in my studio, just waiting for the perfect project. I’m very happy with the way it turned out, what do you think?

Stamp Day Designs, A Little Thanks (1)

Stamp Day Designs, A Little Thanks (2)

See ya next time … ink, ink, smudge, smudge!
— Jessica Kerr, Independent Stampin’ Up! Demonstrator
Place your order today! Send me an email: stampdaydesigns@gmail.com

Price: $5.25

Price: $110.00

Supply List

Built for Free Using: My Stampin Blog

3D – More Thank You Chocolates

Just a couple more Thank You chocolates today!  …

Stamp Day Designs, Chocolate Thanks (1)

Stamp Day Designs, Chocolate Thanks (2)  Stamp Day Designs, Chocolate Thanks (4) Stamp Day Designs, Chocolate Thanks (3)

See ya next time … ink, ink, smudge, smudge!
–Jessica Kerr, Independent Stampin’ Up! Demonstrator
Place your order today! Send me an email: stampdaydesigns@gmail.com

3D – Thank You Chocolates

Quick post today! Who doesn’t love chocolate? I made these adorable boxes to hold a single Lindt “HELLO” chocolate bar. I plan to give these as Thank You gifts to my hostesses. The basic box was made using a single sheet of DSP and the Envelope Punch Board. The belly bands were made from the leftover scraps of the same DSPs, simply utilizing the opposing side!

Stamp Day Designs, Thank You Chocolate Bar (3)Stamp Day Designs, Thank You Chocolate Bar (4)

Stamp Day Designs, Thank You Chocolate Bar (1) Stamp Day Designs, Thank You Chocolate Bar (2)

See ya next time … ink, ink, smudge, smudge!
–Jessica Kerr, Independent Stampin’ Up! Demonstrator
Place your order today! Send me an email: stampdaydesigns@gmail.com

CARD – Thanks, 2 Ways

Whenever I feel like I’m in a bit of a creative slump, I find that CASEing a few cards helps to get the mojo going again. It’s no secret that the catalogs hold an abundance of creative inspiration … they *are* created by professionals after all, lol! But I get so excited when the new catalog arrives, drooling over new products and making wish lists, that I have a tendency to look right past all of those gorgeous sample pictures. I always find myself laughing when I realize that I could go through that catalog ten times a day, and still discover something new every time. (I know, I know – I seriously need to see a therapist!)

Today’s card was a CASEd from pg 16 of the 2015/2016 Annual Catalog. I knew I had all of the products required to complete the card exactly as pictured, but I thought it might be fun to challenge myself. I still had quite a bit of the recently retired Sweet Dreams DSP in my stash, and I loved that it had the same pattern both front and back, in two different colors. After a few minutes of sorting out the details in my head, I knew how I was going to proceed.

Annual15_p017_a

The original card featured three colors: Mint Macaroon, Basic Black and Very Vanilla. All I had to do was swap each of those colors for new colors, and place them in the same locations. First, I swapped the Basic Black and Very Vanilla from the Typeset DSP for the Lost Lagoon and Whisper White from the Sweet Dreams DSP. That left me open to choose any third color to stand in for Mint Macaron. I ended up choosing Sahara Sand, because I knew it would layer well behind the sentiment (being a lighter color), and would also go well with the color on the back side of the DSP. I really like the way these turned out … and I might just have to do similar CASE studies in the future!

Stamp Day Designs, Thanks 2 Ways (1) Stamp Day Designs, Thanks 2 Ways (2) Stamp Day Designs, Thanks 2 Ways (3) Stamp Day Designs, Thanks 2 Ways (4)

See ya next time … ink, ink, smudge, smudge!
–Jessica Kerr, Independent Stampin’ Up! Demonstrator
Place your order today! Send me an email: stampdaydesigns@gmail.com

Supply List

Built for Free Using: My Stampin Blog


CARD – You Make Me Happy

Today’s project had a mind of its own, lol! I hadn’t really used much of my Stacked with Love DSP, and since it will be retiring in a couple of weeks, thought I’d pull it out. This one ended up looking very “Valentine’s Day” to me, so I’ll probably keep it in my stash ’til next year. Even so, I was happy with the way it turned out.

Stamp Day Designs, You Make Me Happy (1)

Stamp Day Designs, You Make Me Happy (2)

I think the construction of this one is pretty straight forward, so I’ll spare you all of the boring details. But I did want to mention that I didn’t have any true Whisper White buttons, so I used one of the Sweet Dreams Designer Series Buttons … because the back of the largest button is white! 😉

See ya next time … ink, ink, smudge, smudge!
–Jessica Kerr, Independent Stampin’ Up! Demonstrator
Place your order today! Send me an email: stampdaydesigns@gmail.com

Card – Yay!

A quick post today! This one consisted of a little sponging over some heat embossed balloons, a bit of DSP and an embossing folder … voila! I intentionally left it a little vague on the front, and will add an interior sentiment when the time comes. It might end up being a birthday, graduation, congratulations, or even a baby card! It’s always nice to have a few options available if a last minute occasion pops up.

Stamp Day Designs, Yay! (1)

Stamp Day Designs, Yay! (2)

See ya next time … ink, ink, smudge, smudge!
–Jessica Kerr, Independent Stampin’ Up! Demonstrator
Place your order today! Send me an email: stampdaydesigns@gmail.com

Price: $29.95

Supply List

Built for Free Using: My Stampin Blog

CARD – Bloom With Thanks

Let’s look at some retiring product today, shall we? This card uses several!

So I’ve got that lovely daisy from the Bloom with Hope stamp set on here, along with that Thank You sentiment from the Label Something set. And then there’s the Strawberry Slush and Baked Brown Sugar card stock, yum!

As a reminder, all retiring tools & accessories (including ink & paper) are available while supplies last … many have even sold out already! Retiring stamp sets, on the other hand, will be produced up until 5/26 – after which time they too will only be available while supplies last.

Stamp Day Designs, Bloom with Thanks (1)

Stamp Day Designs, Bloom with Thanks (2)

I started with an A2 tent-fold card base of Baked Brown Sugar, and added some wide strips of Pink Pirouette, Strawberry Slush and Hello Honey. The strips were embossed with the Arrows embossing folder and then cut at 2-3/4″ before punching the four corners where they met with the Project Life Corner Rounder. Then I stamped the Daisy image onto Whisper White with Staz-On Jet Black ink and quickly colored them with my Stampin’ Write markers (going over everything with a Blender Pen helped smooth everything out). I punched those out with a 1-3/4″ Circle Punch and popped them up on Stampin’ Dimensionals. Then I added some Crushed Curry buttons tied with some White Baker’s Twine on two of the flower centers with Glue Dots. I used my Stampin’ Write Markers again to color directly on the Thank You sentiment and stamped them on Whisper White before punching them out with the 7/8″ Scalloped Circle Punch. This last piece was adhered with another Stampin’ Dimensional.

See ya next time … ink, ink, smudge, smudge!
–Jessica Kerr, Independent Stampin’ Up! Demonstrator
Place your order today! Send me an email: stampdaydesigns at gmail dot com


Price: $4.95

Supply List

Built for Free Using: My Stampin Blog

CARD – So Sweet of You

Ugh! I’ve been under the weather for the last several days, and just haven’t been feeling well enough to play in my stamp studio (nothing serious, just a really bad cold). Hopefully I’m over the worst of it and on the fast road to recovery.

In the mean time, I’ll just have to show you something I made a couple of weeks ago. Here is another card I made with that gorgeous Painted Blooms DSP …

Stamp Day Designs, So Sweet of You (1) Stamp Day Designs, So Sweet of You (2)

I started with an A2 card base of Blackberry Bliss and added a panel of Whisper White, topped with a panel of Painted Blooms DSP. The tag was die-cut with the Chalk Talk Framelit and embellished with Blackberry Bliss 3/8″ Stitched Satin Ribbon cinched with 1/8″ Silver ribbon, before popping it up on some dimensionals.

I heat embossed the sentiment onto a scrap of Rose Red card stock and punched it out with the 1-3/8″ circle punch. I backed that with a 1-3/4″ scalloped circle, punched from Silver Glimmer paper. This piece was adhered on top of the tag with more dimensionals.

See ya next time … ink, ink, smudge, smudge!
–Jessica Kerr, Independent Stampin’ Up! Demonstrator
Place your order today! Send me an email: stampdaydesigns at gmail dot com


Price: $99.95

Price: $29.95

Supply List

Built for Free Using: My Stampin Blog

Card – So Very Kind of You

Another quick and easy card for you today … please excuse my overheated embossing!

Stamp Day Designs, So Very Kind of You (1) Stamp Day Designs, So Very Kind of You (2)

I started with a Basic Black A2 card base, and added a slightly narrower strip of Stacked with Love DSP to the card front. I heat embossed my sentiment in White Stampin’ Emboss Powder and die-cut with the Circle Collection Framelits. Then I die cut some Coastal Cabana with one of the Starburst Framelits and adhered it behind the circle before popping it up on some Stampin’ Dimensionals. Enjoy!

See ya next time … ink, ink, smudge, smudge!
–Jessica Kerr, Independent Stampin’ Up! Demonstrator
Place your order today! Send me an email: stampdaydesigns at gmail dot com


Supply List

Built for Free Using: My Stampin Blog

CARD – Best Sale-A-Bration Ever!

Can you believe Sale-A-Bration is ending in three days?! I’m always bummed when the end is near, seeing all of these wonderful stamp sets, papers and accessories that will be leaving for retirement … they will surely be missed.

Today’s card was made with several items from the original Sale-A-Bration catalog that I earned for FREE with my own personal orders of $50 or more … you can too, it’s not too late! And don’t forget, there were BONUS items add to Sale-A-Bration during the month of March, and even some regular catalog items (added when Blendabilities were discontinued)!

Stamp Day Designs, You Made My Day (1)

Stamp Day Designs, You Made My Day (2)

I started out with an A2 card base of Sahara Sand, topped with a panel of Whisper White. I cut another panel of Best Year Ever DSP, but used my Circles Collection Framelits to die-cut the circle out of the center. I tied a small piece of Coastal Cabana ribbon around the right side of the panel (through the circle), and popped the whole thing up on Stampin’ Dimensionals.

I used my Stampin’ Write Markers (Calypso Coral, Hello Honey and Coastal Cabana) to color directly on my sentiment stamp, and then stamped it onto Whisper White before punching it out with my 1-3/4″ circle punch. Then I die-cut a piece of Calypso Coral with one of the Starburst Framelits and adhered it behind. Finally, I used more Stampin’ Dimensionals to give the piece a little lift in the middle of that circle.

See ya next time … ink, ink, smudge, smudge!
–Jessica Kerr, Independent Stampin’ Up! Demonstrator
Place your order today! Send me an email: stampdaydesigns at gmail dot com

Price: $99.95

Supply List

Built for Free Using: My Stampin Blog