CARD – You’ll Be Missed

Good afternoon stampers! I’m laying around on the couch today, having caught some cooties from the kids. Nothing serious, just a little cold that’s got me feeling run down and generally irritated by just about anything. I was surfing over on Facebook a few minutes ago, and noticed my Uncle posted a video of the first snowfall of the year … yup, you read that right … SNOW. (Just one more thing to be irritated about.) The funny thing is, this was less than a half hour ago and he is exactly 5 miles due west of me, but somehow we didn’t get any. I know it’s been a very mild fall thus far, but these abrupt Michigan weather changes can be pretty ridiculous. The kiddos are currently playing outside in the sunshine.

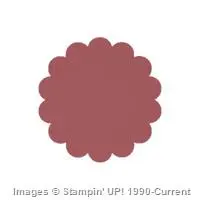
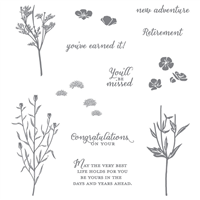
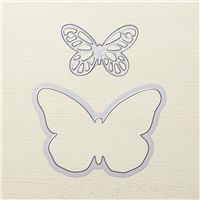
Anyway, with evidence of that dreaded four-letter-s-word, I thought today’s “You’ll be Missed” card was a very appropriate send-off to our warmer weather, lol! I used a couple of retired products here, so you’ll have to excuse any substitutions in the supply list. Also, I used fun foam to give the butterfly a very even and stable base.

Stamp Day Designs, You'll Be Missed (1) Stamp Day Designs, You'll Be Missed (2)

See ya next time … ink, ink, smudge, smudge!
–Jessica Kerr, Independent Stampin’ Up! Demonstrator
Place your order today! Send me an email: StampDayDesigns@gmail.com

Price: $6.50

Supply List

Built for Free Using: My Stampin Blog

CARD – Deck the Halls

Just a quick post today featuring a couple of new items from the brand-new 2015 Holiday Catalog, “Handmade for the Holidays,” which went public this past Tuesday (yippee!).

I’ve got to say that I am loving these new ornament dies … so very versatile! There are three different size ornaments in the die set. Two of the ornaments have both an intricately cut version (as used in my card today), and an outline version. And of course there’s a coordinating stamp set. Use them together, or use them separately, the combinations are endless!

140857

Embellished Ornaments Clear-Mount Bundle, $41.50 (#140857)

So on to today’s card … I was working toward a clean and simple design, and I think I’ve achieved it. The ornament and card base were another couple of pieces that had been sitting in my workspace for awhile. Neither were working well in the projects for which they were originally intended, but fate has brought them together (ha ha ha). Enjoy!

Stamp Day Designs, Deck the Halls (2)

See ya next time … ink, ink, smudge, smudge!
Jessica Kerr, Independent Stampin Up! Demonstrator
Place your order today! Send me an email: StampDayDesigns@gmail.com

Price: $110.00

Supply List

Built for Free Using: My Stampin Blog

CARD – Hope It’s Sweet!

Seems like the last few times I’ve headed down into the studio, I’ve had some fantastic ideas … that just puttered out. You know what I’m talking about, don’t you? I can picture in my mind exactly what I think I’m going to make, but somehow the project takes a turn down a dark alley – a place that’s kinda uncomfortable and not very pretty.

When my projects take a turn for the worst, I’m very tempted to just crumple them up and stuff ’em in the old garbage can. Sometimes I do, but more often than not I simply STOP, give myself a pep talk (“trust the process, trust the process”), and set aside the unassembled bits to deal with another day. These bits may not be used together as originally intended, but somewhere along the way I’m usually able to incorporate them into something even better.

So today’s card is a great example of me “trusting the process.” I finally put one of those random bits to good use! That adorable doughnut has been sitting in my workspace staring at me for nearly a month. I don’t know why, but gosh darn it, I just could not get it to work in my original vision. Take a look at how sweet it is!

Stamp Day Designs, Hope It's Sweet (1)
Stamp Day Designs, Hope It's Sweet (2)
Stamp Day Designs, Hope It's Sweet (3)

So if you’re wondering exactly how I made that doughnut, it was super simple. You will need two pieces of card stock, at least 2-3/4″ x 2-3/4″. First, punch a 3/4″ circle in each, inserting the punch as far into the center as possible. Next, using a 2-1/2″ Circle punch, center the 3/4″ circle in the window before punching. Randomly trim away the edges of your “frosting,” and embellish as desired

To assemble, I placed Stampin’ Dimensionals on the back of the “frosting” before sticking my finger through both holes to align them before adhering. The little “bite” is simply a 1-1/4″ scalloped circle punch. Keep in mind that the Stampin’ Dimensionals may make it a little tough to get the doughnut into the punch, but be firm and gentle and you will prevail.

See ya next time … ink, ink, smudge, smudge!
–Jessica Kerr, Independent Stampin’ Up! Demonstrator
Place your order today! Send me an email: StampDayDesigns@gmail.com

Price: $110.00

Supply List

Built for Free Using: My Stampin Blog